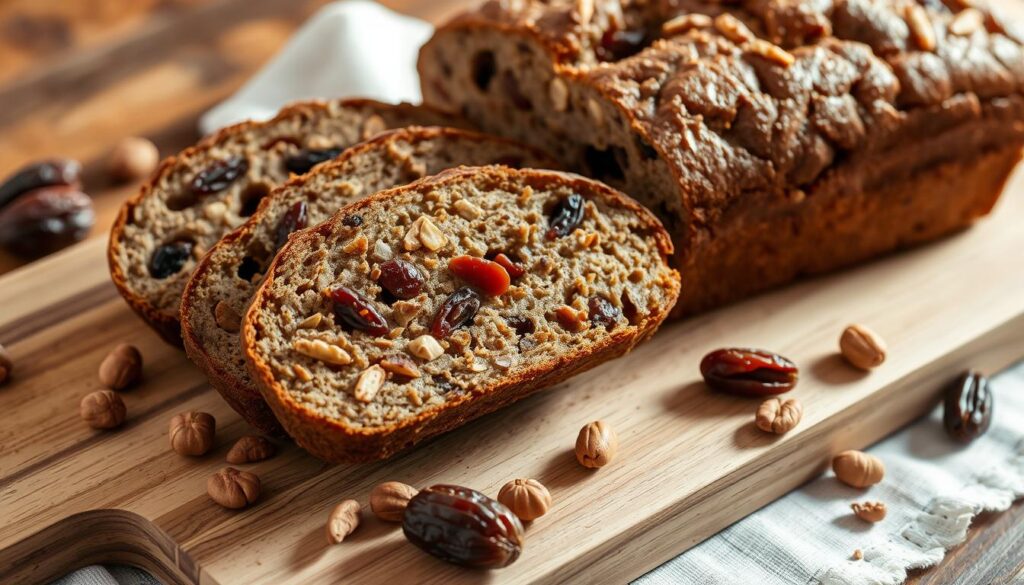
Discover the secret to making a delicious homemade date and nut bread Recipe. This easy recipe combines chewy Medjool dates and crunchy walnuts. It results in a moist and flavorful treat that’s hard to resist.
Whether you’re an experienced baker or new to the kitchen, this recipe is simple yet impressive. It’s sure to become a favorite in your family.
Key Takeaways
- Discover the perfect blend of dates and nuts for a delectable homemade bread
- Learn the essential ingredients and step-by-step instructions for baking a moist and flavorful date nut bread
- Explore the history and health benefits of this classic sweet treat
- Uncover common mistakes to avoid and expert tips for achieving the perfect texture
- Explore serving suggestions and pairing ideas to elevate your date nut bread experience
Introduction to Date and Nut Bread: A Perfect Sweet Treat
Date and nut bread Recipe is a classic in traditional baking. It comes from ancient times and has won many hearts. The mix of dates and nuts is a flavor dream come true.
History of Traditional Date Bread
Date bread is a favorite in many places, especially where dates grow. It’s been a key part of Middle Eastern and North African food for ages. It’s a nourishing snack or a treat for special times.
Why Dates and Nuts Make a Perfect Combination
Dates and nuts are a match made in heaven. Their sweetness and texture mix perfectly. Dates are full of fiber and vitamins, while nuts offer protein and healthy fats. Together, they make a delicious and healthy sweet quick bread.

“Date bread is a timeless treat that brings a taste of history and wholesome goodness to every bite.”
Essential Ingredients for Your Date and Nut Bread Recipe
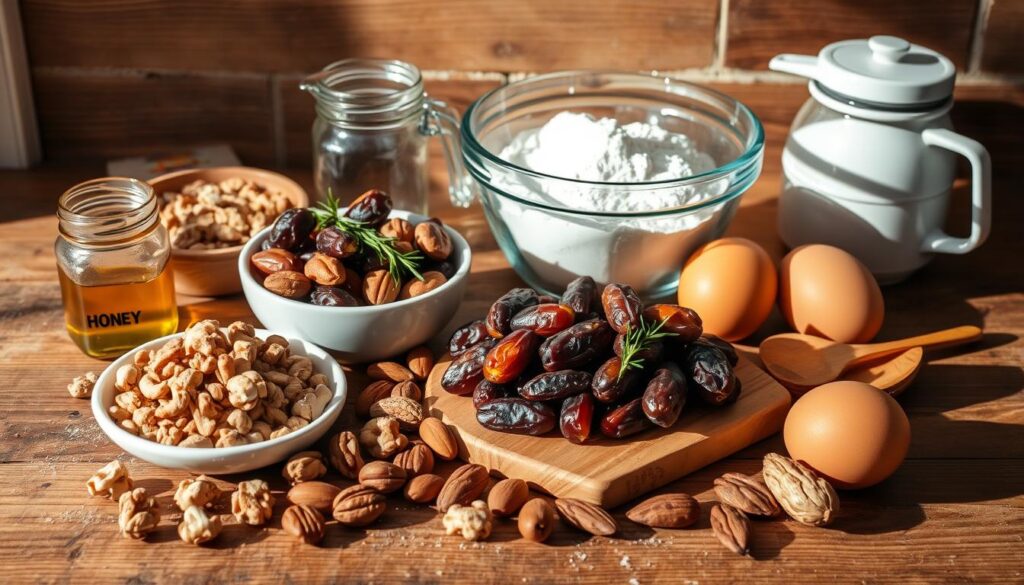
Making a tasty date and nut bread recipe needs the right ingredients. At the center are Medjool dates and walnuts. Together, they create a sweet and nutty taste that’s hard to resist.
You’ll also need some other key items. All-purpose flour is the base, while baking soda and salt balance the flavors. Eggs and vegetable oil make the bread moist and soft.
But you can also add your own twist. Try using different nuts like pecans or almonds instead of walnuts. You can also experiment with different dates to find your favorite taste.
| Ingredient | Quantity | Purpose |
|---|---|---|
| Medjool dates | 1 cup, pitted and chopped | Provides sweetness and moisture |
| Walnuts | 1 cup, chopped | Adds texture and nutty flavor |
| All-purpose flour | 2 cups | Serves as the base for the bread |
| Baking soda | 1 teaspoon | Helps the bread rise and achieve the desired texture |
| Salt | 1/4 teaspoon | Balances the sweetness and enhances the overall flavor |
| Eggs | 2 | Contributes to the rich and moist texture |
| Vegetable oil | 1/2 cup | Ensures a tender crumb and moist interior |
With these ingredients, you’re ready to make a delicious date and nut bread. The secret to success is finding the right mix of flavors and textures that you love.

For more ideas, browse this guide on creative Cream of Wheat recipes to find unique flavor combinations.
Kitchen Tools and Equipment Needed
To make a great date and nut bread, you need the right tools. You’ll need the basics and a few extra items for the best results.
Must-Have Baking Tools
- A sturdy loaf pan for baking the bread
- Large mixing bowls for combining wet and dry ingredients
- Measuring cups and spoons for accurate ingredient measurements
- A flexible spatula for gently folding and mixing the batter
- A cooling rack to allow the baked bread to cool completely before slicing
Optional Equipment for Better Results
While the basics are necessary, some optional tools can help a lot. They make the baking process easier and the results look professional:
- A stand mixer or hand mixer to thoroughly blend the ingredients
- Parchment paper or a silicone baking mat to line the loaf pan for easy release
- A bread knife or serrated knife for neatly slicing the cooled loaf
- A kitchen scale to measure ingredients by weight for greater precision
Choose tools that you’re comfortable with and that make baking fun. Good kitchen equipment leads to delicious homemade date and nut bread every time.
Preparing Your Dates and Nuts for Baking
Getting your dates and nuts ready is key for a great date and nut bread recipe. Let’s look at the important steps to prepare your ingredients.
Chopping the Dates
Begin by cutting your dates into small, even pieces. This ensures they spread out evenly in the bread. Use a sharp knife or kitchen shears to chop them into raisin-sized pieces.
Toasting the Nuts
Toasting the nuts enhances their flavor. Preheat your oven to 350°F (175°C). Spread the nuts on a baking sheet and toast for 5-7 minutes. Stir them a few times until they’re fragrant and lightly browned, but not burnt.
Soaking the Dates
Soaking the chopped dates in hot water for 30 minutes makes the bread more moist. It softens the dates and adds moisture, making the bread tender and delicious.
Measuring the Ingredients
Measuring your ingredients accurately is crucial for good results. Use dry measuring cups for dry ingredients and liquid measuring cups for wet ingredients. Level off each measurement with a knife for precise amounts.
By chopping the dates, toasting the nuts, soaking the dates, and measuring your ingredients, you’re ready for a successful baking experience.
Step-by-Step Mixing Instructions
Making date and nut bread is more than just mixing ingredients. It’s about getting the right texture and flavor. Let’s go through the steps to make sure your batter is just right.
Wet Ingredient Preparation
Start by creaming the butter and sugar together. Use the creaming method until it’s light and fluffy. This step adds air, making the bread soft and tender.
Then, whisk in the eggs one at a time. Make sure each egg is fully mixed before adding the next.
Dry Ingredient Combination
In another bowl, mix the dry ingredients like flour, baking soda, and spices. Fold these into the wet ingredients using the folding technique. This gentle folding keeps the batter light and prevents it from becoming dense.
Proper Mixing Techniques
- Mix the batter just until the ingredients are combined. Avoid overmixing to prevent a tough texture.
- Fold in the chopped dates and nuts gently. This ensures they’re spread evenly in the batter consistency.
- Don’t use an electric mixer for this step. It can make the batter too airy, leading to a dry crumb.
By following these steps, you’ll get a perfectly mixed date and nut bread batter. It’s now ready to be baked to perfection.
Baking Tips for Perfect Texture
Getting the perfect texture in your date and nut bread is all about the baking process. To make sure your loaf is moist, tender, and full of flavor, watch the oven temperature and baking time closely.
The best oven temperature for baking date and nut bread is between 325°F to 350°F. This temperature helps the bread bake evenly. It gives a golden crust and a soft, fluffy inside. Adjust the baking time to 45 to 60 minutes, depending on your oven and loaf size.
To check if the bread is done, use a toothpick. If it comes out clean, without wet batter, it’s ready. Let the bread cool completely on a wire rack before slicing. This helps set the texture and prevents crumbling.
| Baking Tip | Recommendation |
|---|---|
| Oven Temperature | 325°F to 350°F |
| Baking Time | 45 to 60 minutes |
| Toothpick Test | Clean toothpick means the bread is done |
| Cooling Process | Cool completely on a wire rack before slicing |
By following these baking tips, you’ll make a perfectly textured date and nut bread. Your family and friends will love it.
“The key to a moist, delicious date and nut bread is all in the baking technique. Pay attention to the oven temperature and timing, and you’ll be rewarded with a loaf that’s irresistible.”
If you prefer using canned ingredients for quick recipes, check out this simple peach cobbler recipe using cake mix.
Storage and Shelf Life Guidelines
Storing your homemade date and nut bread right is key to keeping it fresh and tasty. Follow these tips to keep your bread in perfect shape.
Proper Storage Methods
For short-term storage, use an airtight container at room temperature. This keeps the bread moist and prevents it from drying out. Don’t let the bread sit out in the open, as it can lose its softness.
For longer storage, the freezer is best. Wrap the loaf in freezer-safe wrapping or put it in a strong, airtight container. This keeps the bread fresh for up to 3 months without freezer burn.
Freezing Instructions
- Let the bread cool down completely before freezing.
- Wrap it tightly in plastic wrap or aluminum foil, squeezing out air.
- Put the wrapped bread in a resealable freezer bag or airtight container.
- Mark the package with the date and what’s inside.
- To enjoy, thaw at room temperature or in the fridge overnight before serving.
By using these easy storage and freezing methods, you can enjoy your homemade date and nut bread for months.
Nutritional Benefits and Dietary Information
Indulge in the nutritional powerhouse that is date and nut bread! It’s packed with fiber, healthy fats, and natural sweeteners. This treat offers many benefits for your well-being. It’s perfect for those following a gluten-free diet or looking for a wholesome snack.
Dates are the star ingredient, known for their fiber content. They provide natural energy and support digestive health. When paired with nuts like almonds or walnuts, the bread gets a rich texture. It also gets a boost of healthy fats, which are good for your heart and brain.
The recipe can be adapted for gluten-free options, making it accessible to more people. Using natural sweeteners like honey or maple syrup makes it a healthier choice. This is compared to traditional breads loaded with refined sugars.
| Nutrient | Amount per Serving | % Daily Value |
|---|---|---|
| Fiber | 3g | 11% |
| Healthy Fats | 7g | 9% |
| Natural Sweeteners | 12g | N/A |
Indulge in the delectable and nourishing goodness of date and nut bread. It caters to various dietary needs and offers many nutritional benefits. Savor the flavors, nourish your body, and enjoy this wholesome delight!
Common Mistakes to Avoid
Baking date and nut bread can be a delightful experience, but it’s not without its challenges. Avoid these common pitfalls to ensure your homemade loaf turns out perfectly moist and flavorful every time.
Troubleshooting Tips
One of the most common issues bakers face is overmixing the batter. This can lead to a dense, tough texture. To prevent this, be gentle when incorporating the wet and dry ingredients and stop mixing as soon as they are just combined.
Another common problem is underbaking. Undercooked date and nut bread will be gummy and doughy. Use the toothpick test to ensure your loaf is fully baked through before removing it from the oven.
Expert Solutions
If you encounter ingredient substitution issues, such as using the wrong type of flour or forgetting the baking soda, your bread may turn out with a strange texture or flavor. Always double-check your recipe and measure ingredients precisely.
Lastly, texture problems like a crumbly or dry crumb can occur if you’ve over-measured the nuts or dates. Adjust the ratios of these add-ins to achieve the perfect balance of moist and nutty in your homemade date and nut bread.
By keeping these common mistakes in mind and following the recipe closely, you’ll be well on your way to baking date and nut bread perfection. With a little practice, you’ll master this delectable treat in no time.
Serving Suggestions and Pairing Ideas
Make your date and nut bread special by trying different ways to serve it. It’s great for breakfast, afternoon tea, or dessert. Each option brings out the best in this tasty treat.
Breakfast Pairings
Begin your morning with a slice of date and nut bread and a cream cheese spread. The mix of the bread’s richness and the cream cheese’s tang is perfect. For a richer breakfast, add honey or cinnamon sugar on top.
Afternoon Tea Delights
For a midday treat, pair your bread with afternoon tea. The tea’s warmth and the bread’s flavors make for a cozy moment. You can also add jams, marmalades, or cream cheese spread for extra delight.
Dessert Options
Indulge in dessert with date and nut bread. Toasted and topped with vanilla ice cream, caramel, and nuts, it’s a treat. You can also make a bread pudding or a fruit parfait with it.
| Serving Suggestion | Pairing Ideas |
|---|---|
| Breakfast | Cream cheese spread, honey, cinnamon sugar |
| Afternoon Tea | Afternoon tea, jams, marmalades, cream cheese spread |
| Dessert | Ice cream, caramel sauce, chopped nuts, bread pudding, fresh fruit, whipped cream |
However you serve your date and nut bread, it’s sure to be a hit. It adds flavor and satisfaction to any meal or event.
FAQs
What are the main ingredients in date and nut bread?
Date and nut bread has Medjool dates, walnuts or pecans, and all-purpose flour. It also includes baking soda, salt, eggs, and vegetable oil.
What are the health benefits of date and nut bread?
Date and nut bread is a healthy sweet treat. It’s full of dietary fiber, healthy fats, and natural sweeteners. The dates and nuts add vitamins, minerals, and antioxidants, making it a great choice.
How do I prepare the dates and nuts for baking?
To get ready, chop the dates and toast the nuts to boost their taste. Soaking the dates in hot water can also help if they’re hard.
What are some common mistakes to avoid when making date and nut bread?
Avoid overmixing the batter and underbaking the bread. Also, don’t use the wrong ingredient substitutes. These mistakes can ruin the bread’s texture and taste.
How should I store and preserve date and nut bread?
Store the bread in an airtight container at room temperature for up to 5 days. For longer storage, freeze it wrapped in plastic or foil for up to 3 months.
What are some serving suggestions for date and nut bread?
Enjoy date and nut bread in many ways. Try it for breakfast with cream cheese, as an afternoon snack with tea, or as a dessert with vanilla ice cream.
Conclusion
Homemade date nut bread is a treat that brings joy to all. It mixes the sweetness of dates with the crunch of nuts. This creates a perfect balance of flavors.
By following the steps and tips, you’ve learned to bake this bread well. The joy of baking a loaf is unmatched. It smells amazing and tastes even better.
Feel free to try new things with this recipe. Swap nuts or add spices like cinnamon. There’s no limit to making it your own. Enjoy baking and let your creativity flow.


1 thought on “Nutty Delight: How to Make Date and Nut Bread Recipe”